|
Digital Terrestrial Photogrammetry Project
Andrew Davidhazy
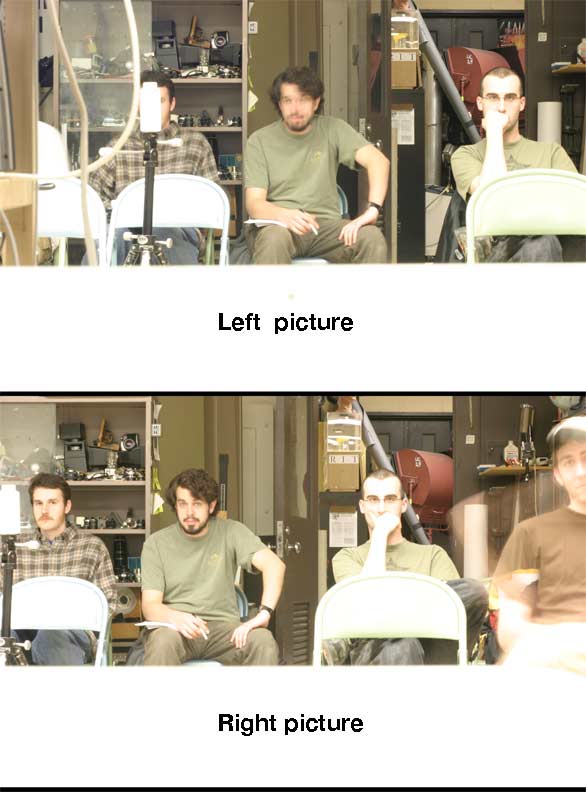
Imaging and Photographic Technology School of Photographic Arts and Sciences Rochester Institute of Technology Photogrammetry is the science of making measurements of subjects. It generally also implies the "remote" measurement of such subjects from airplanes in which case it is usually called aerial photogrammetry or simply photogrammetry. Photogrammetry methods attempt to establish the distance to a given subject by making a pair of photographs separated by some known distance with a camera whose lens focal length is also known. These pairs of photographs are called a "stereo pair." The fact the camera changes positions between the two views gives rise to differential displacement of objects within a scene depending on their distance from the camera lens. In "real" applications the two separate images are carefully arranged and measured with respect to marks included in the camera image plane. While in precision photogrammetry systems the two images are kept separate and examined with instruments of great precision, this article suggests that a simplified approach can make an understanding of how the sophisticated systems work and do so at a budget. This suggestion depends on the fact that the two separate images can be combined in something like Photoshop and displacements of subject images made directly from the composite result. This is a project that I describe and demonstrate in a college classroom but the principles at work should not be beyond the reach of high school students as well. The illustration shows the reasoning behind the possibility of making the measurement to a subject at an unknown distance based on camera dependent information. Basic trigonometry at work! 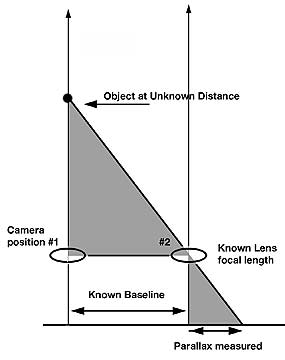 Step 1. Make two
photographs a known distance apart
keeping the optical
axes parallel. This distance is known as the BASELINE. A "stereo bar"
helps keep the camera aligned for the two photographs but any aid that
accomplishes this can be used. Step 1. Make two
photographs a known distance apart
keeping the optical
axes parallel. This distance is known as the BASELINE. A "stereo bar"
helps keep the camera aligned for the two photographs but any aid that
accomplishes this can be used. 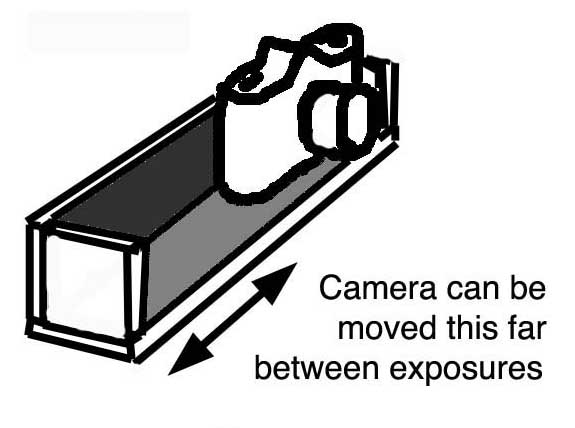
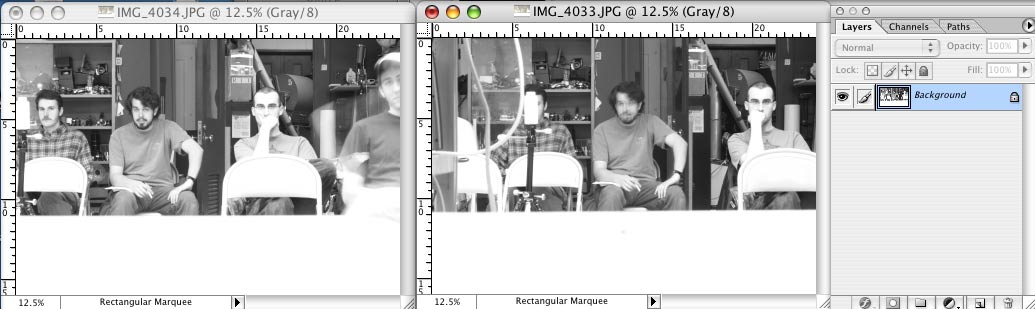
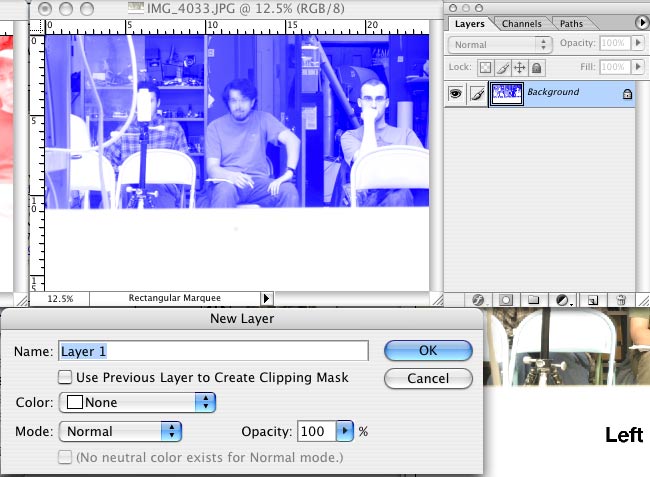
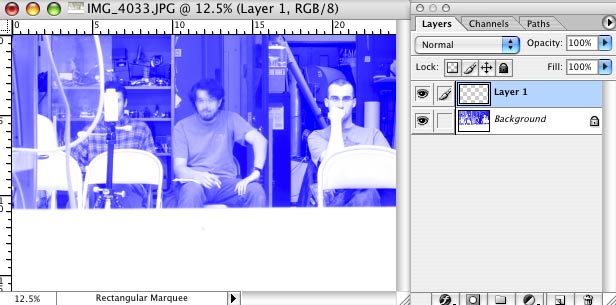
Briefly, a stereo-bar need be nothing more than a device that can be securely fastened to a sturdy support, such as a desk or a window sill, and so designed that it allows a camera to make a photograph from each of two positions while keeping the camera's optical axis, or pointing direction, undisturbed. A simple L channel, as shown, made out of straight wood with stops at either end is quite suitable for the purpose. It should be about 2 feet long if measurements up to about 50 feet will be made. Notice that when the successive photographs are made from each end of the bar objects located at infinity will record in the same position in each of the two photographs. Those that are nearer, however, will appear to shift positions. This is called PARALLAX. Step 2. After making the 2 photographs move the images onto your computer. Step 3. Open both in something like Photoshop. Step 4. Make them both grayscale first. Discard color! Step 5. Interestingly now revert back to RGB color mode for each picture. Step 6. Select one picture (duh!) and using curves select the BLUE channel and max out the contrast which should make the grayscale image blueish looking.
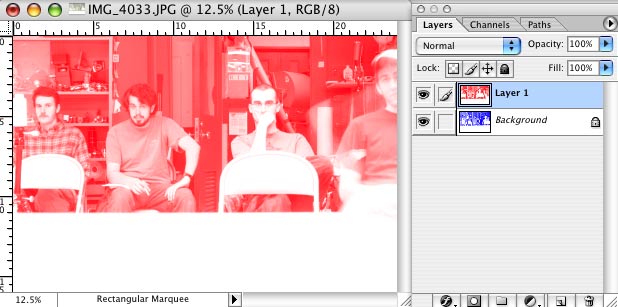
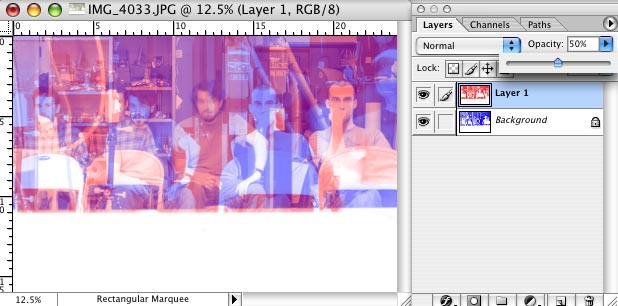
Step 7. Switch to the other image and going to curves again select the RED channel and max out its contrast which should make the image quite red. Step 8. Choose SELECT ALL and then in edit choose COPY. This places a copy of the RED image "in memory". Step 8. Go to the BLUE image and in LAYERS make a new layer. Step 9. Select VIEW Layers. This should also show you in a box the controls you have over layers. 10. Click or go to the blank layer. This puts a blank mask over the first BLUE photo. Now in edit say PASTE. 11. This should place a RED image over the BLUE one. To see through the RED image in the layers control box find "opacity" and slide the slider to something like 50%. This should cause the RED layer to become transparent revealing image details of the BLUE layer underneath. These will not be "in registration" except at the edges ... because the two pictures were taken from 2 different points of view. 12. In Photoshop preferences select the "rulers and units" option and select millimeters for units. 13. Back looking at image select "Image Size" constraining proportions and file size. Make image size in one of its dimensions the same as that of the sensor in the camera. If you have a camera with a 1.5X "lens factor" then the width of your image will be 24mm. If it is 1.6x then it will be 36mm / 1.6 or 21mm, etc. 14. At this point the scales alongside your image will be displayed "life size" with respect to the size of the sensor. 15. Now find the "measure" ruler in the toolbox (sometimes hidden in the eyedropper area). 16. Note that when this tool is selected you can find out the displacement of one object between the two photographs by the simple expedient of starting to measure from some point on a given subject, let's say in the blue record and the corresponding point of the subject in the second, or red, photograph. 17. That distance is the PARALLAX of the object at some unknown distance. 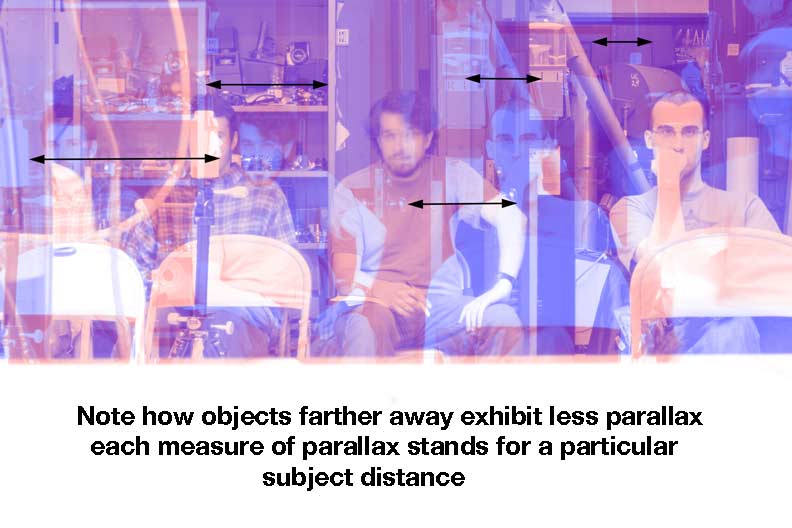 18. The UNKNOWN distance from the lens to the object is equal to the camera LENS FOCAL LENGTH multiplied by the BASELINE (or distance the camera moved between the two photos) and divided by the PARALLAX of the object at the unknown distance. 19. Compare the distance you determined by measurement with the actual distance measured with a yardstick and see if you came anywhere close. Hopefully you did and you will "know" that the results are not merely due to chance or wild guess. You should be able to determine distances to objects with an accuracy of better than 5% and this is significantly better than what can be done by unaided human estimation. 20. Now ponder the situation and comment on possible discrepancies and parallax vs. distance relationships. OK. Now that you have acquired basic skills in making measurements from a pair of stereo photographs let us put your perspective analytical skills to the test.  The view above represents two superimposed photographs made as described above and taken of 2 signs, each simply containing the word END on their surface. These signs, A and B, are located some distance away from a camera. It is given that sign B is located 10 feet from the camera. Now answer the questions posed without first looking at the answers provided below. Answer: Sign A must be located 1/2 the distance from the camera that B is (or 5 feet) because its parallax is twice as large as that of sign B. Sign B is 4 times larger than A. If both were the same size, A being twice as close as B, A should appear twice as large as B. But here it is 1/2 the size of B. Therefore sign A must be 1/4 the size of sign B and therefore sign B in reality is 4 times the size of sign A. whew! andy davidhazy PS: if you found this somewhat interesting or if you detected an error in logic or presentation please take a minute and let me know. My email is: andpph@rit.edu |