IN-CAMERA MASKING WITH 35mm CAMERAS
![[microscope in front of daisies]](text-figures/
icm-1m.jpg) As exemplified by this photograph made according to the directions given in
this article, in-camera masking is a process whereby two exposures are made
sequentially on a piece of film and where image information is recorded onto
unexposed spaces (dark areas) of the first exposure when the second exposure is
made. This gives photographers the ability to place a given subject (usually
inanimate since there should be no subject motion between exposures) in or
against any background scene desired by the photographer (assuming the
photographer owns a transparency of the particular location).
As exemplified by this photograph made according to the directions given in
this article, in-camera masking is a process whereby two exposures are made
sequentially on a piece of film and where image information is recorded onto
unexposed spaces (dark areas) of the first exposure when the second exposure is
made. This gives photographers the ability to place a given subject (usually
inanimate since there should be no subject motion between exposures) in or
against any background scene desired by the photographer (assuming the
photographer owns a transparency of the particular location).
Sophisticated (and expensive) in-camera masking devices exist for 4x5 cameras
but it should be possible for amateur photographers to exploit the potential
for combining background and foreground images using 35mm cameras to mimick
what the BIG cameras do with the following procedure:
1. Attach a transparency of the location you want to appear in the background
to a length of 35mm film. The transparency must be cut down so it is 24mm wide
and is a bit longer on each side than the gate of the camera. You do this by
cutting away the sprocket holes from a length of film about three frames long
with the desired background image in the middle.
2. Using thin tape attach the right end of the above piece of film to a
length of regular 35mm film so that it looks like an extension.
3. After you have cocked the shutter install this assembly into a 35mm camera
making sure the sprocket holes engage the sprockets on the sprocket drive in
the camera and the sprocketless portion of film traverses over to the other
side of the image gate with the desired image located across the image gate of
the camera.
Note that the transparency should be upside down in the gate of the camera
and its emulsion should be facing the camera lens. You might use a _very_ small
piece of two sided sticky tape placed on the opposite side of the gate from the
sprockets to gently hold the film in place. Most often this is not really
needed. Make sure to blow off any dust adhering to the film surface.
If you place a piece of groundglass over the film plane of the camera and
open the camera's shutter, you should now see the subject you are aiming the
camera at superimposed over the scene in the transparency located over the
image gate.
4. In the dark now load some unexposed film into the camera making sure its
sprocket holes do not reach and engage the sprocket drive.
This is how the completed assembly using "dummy" film should look like in
the back of the camera:
                                         taped
           I=======I_____________________. V_____________-___
           I       #0 0 0 0 0 0 0 0 0 0 0| |0 * O O O O O O |
           I       # .-------------------|-|  |             |
           I       # |     |          |  | |  |             |
    supply I       # |     |          |  | |  |             | <- take-up
   cassetteI       # |     |          |  | |  |             |    spool
           I       # '-------------------|-|  |             |
           I       #O O O O O O O O 0 0 0| |0 * O O O O O O |
           I=======I---------------------' '--+----------_---
             |___|     trimmed transparency   | <- sprocket drive
                       under raw film stock
 5. To make the first exposure place the subject of interest (the foreground
subject) in front of the camera and light it in silhouette against a white
background. The camera should be securely attached to a firm tripod and the
subject should be able to stand still for several seconds if you expect good
registration of your subject against the chosen background. However, sometimes
interesting effects can be achieved by exploiting misregistration effects.
5. To make the first exposure place the subject of interest (the foreground
subject) in front of the camera and light it in silhouette against a white
background. The camera should be securely attached to a firm tripod and the
subject should be able to stand still for several seconds if you expect good
registration of your subject against the chosen background. However, sometimes
interesting effects can be achieved by exploiting misregistration effects.
To determine the exposure necessary for the first shot make it based on a
reflected light reading off the white background using a film speed that is
three stops slower than the film you have loaded in the camera or using the
film at its's rated speed base it on a reflected meter reading made off an 18%
grey card placed on the white background.
If you have an incident meter then determine exposure by placing it on the white
background and aimed at the camera. If you are using an unusually dark
transparency you might want to overexpose by a stop or two over what would be
required for a "normal" exposure.
6. After this shot recock the shutter and fire it with a lenscap over the
lens. Recock the shutter again and you are ready for the second exposure of
the in-camera masking set. This should have moved the transparency out of the
way and rolled it up onto the take-up spool.
7. Now to make your second exposure, replace the white background with an
absolutely black background behind your subject. Black velvet is best. Move
your lights so that they illuminate your subject as desired but without
spilling much light onto the background.
Without changing the aperture, determine the exposure time required to properly
expose you subject using an incident or reflected meter reading but make sure
to make it based on using the film's normal speed rating.
Since the raw film stock was not connected to the sprocket drive of the camera
it should not have moved between exposures. If it was connected to the supply
spool then you could at this time rewind the film into the supply cassette and
process it. Otherwise, empty the camera in a darkroom and complete the
development process. Note that the image of interest is going to be located
very close to the end of the film so take extra care to handle this end with
care.
Taking an extra step to minimize scratches to the "background" transparency
might be something you want to do. Since this transparency my "whip around" the
take up chamber as it is advanced out of the way of the film, you could
temporarily install felt or other soft surface over some of the metal parts of
the take up chamber for the transparency to rub against.
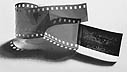
![[microscope and desert icm sequence]](text-figures/
icm-fbc-1m.jpg)
Above is a step-by-step story of how this effect was achieved to place an image of a desert
scene in the background of a microscope sitting on a tripod head (not too creative I admit!).
On the left is the result of the first exposure where the microscope is lit in silhouette and the
backround behind it is white and the transparency of the desert scene is located between the film
plane rails of the camera. The second image is that which would result from making a photograph of
the microscope against a black background with the transparence removed from in front of the raw film
stock. The third image is the result of the two exposures taking place on a single frame of
35mm film.
By the way, a similar scheme can be undertaken with 2 1/4 cameras that have a removable back. These
backs are typically attached to the camera body by fairly precise locating pins and it is possible
to replace the back fairly close to its original position after removing it from the body. This
opens up the possibility of placing a transparency over the film gate aperture of the back and
after making the silohuette shot, taking the back off, removing the transparency, replacing the back
and making the second exposure (recocking the shutter while the back is off the camera body). Since this does
not require opening a back (such is in a 35) to replace the transparency, it is possible to make more
than 1 ICM image on a roll of 120 or 220 film.
In any case, you should end up with a composite image where it will be difficult to tell
that the foreground object was not located in the scene that you chose for its
background. The photographs shown at the top and bottom of this page were made with a 35mm
camera exactly as described in the article. If you want to make sure the illusion is
not destroyed make sure the lighting direction in the foreground scene matches
that of the background scene. There are a lot of interesting possibilities to
in-camera masking.
If you would like to discuss this project with me I would be happy to
provide whatever assistance is needed. Contact me at RIT, PO box 9887,
Rochester, NY 14623. Phone 716-475-2592, fax 716-475-5804 ... but the fastest
way is to just send me e-mail at andpph@rit.edu
![[microscope in front of daisies]](text-figures/icm-1.jpg) As exemplified by this photograph made according to the directions given in
this article, in-camera masking is a process whereby two exposures are made
sequentially on a piece of film and where image information is recorded onto
unexposed spaces (dark areas) of the first exposure when the second exposure is
made. This gives photographers the ability to place a given subject (usually
inanimate since there should be no subject motion between exposures) in or
against any background scene desired by the photographer (assuming the
photographer owns a transparency of the particular location).
As exemplified by this photograph made according to the directions given in
this article, in-camera masking is a process whereby two exposures are made
sequentially on a piece of film and where image information is recorded onto
unexposed spaces (dark areas) of the first exposure when the second exposure is
made. This gives photographers the ability to place a given subject (usually
inanimate since there should be no subject motion between exposures) in or
against any background scene desired by the photographer (assuming the
photographer owns a transparency of the particular location).

![[microscope and desert icm sequence]](text-figures/icm-fbc-1.jpg)