|
Home-made Adapter for Canon FD lenses on EOS bodies
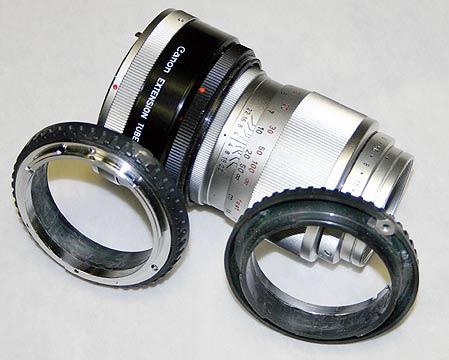
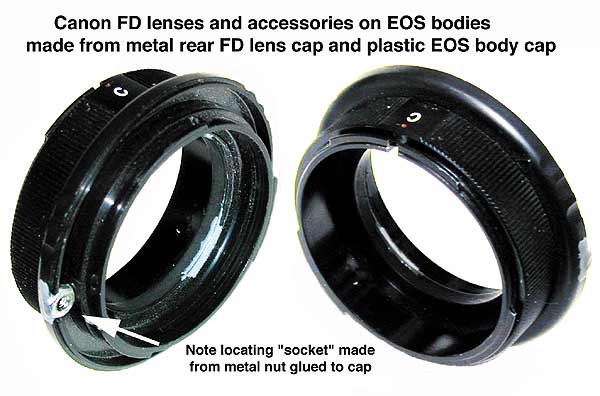
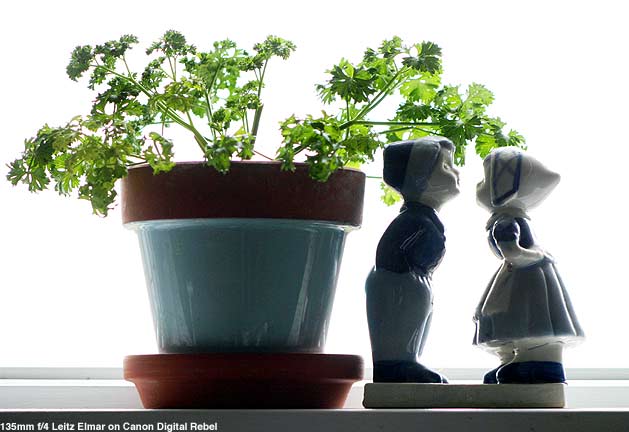
Andrew Davidhazy This story started out with a purchase of a Canon Digital Rebel camera as one of my first steps in getting involved with the digital revolution beyond just use of point-and-shoot digital cameras. This camera would allow me to use interchangeable lenses. Unfortunately I did not have just about any EOS mountable lenses. But I had lots of FD lenses and other types of photographic equipment. I was stymied by the impossibility of attaching my camera to any of these systems because I only had this one camera to work with. When Canon decided to change lens mounts when it went from manual focus to autofocus lenses photographers adapted in various ways to the change. From the purchase of complete new camera and lens systems to attempts at adapting the FD mount lenses to the new EOS FL lens mount. Although Canon itself made an adapter that simply converted one lens flange to another infinity focus was lost. They also made a short "telextender" type adapter that essentially increased the focal length of any FD lens attached to it losing a stop in the process. In neither case was exposure metering at full aperture possible (with auto stop-down for shooting) and one had to also focus the lens manually. While this was an inconvenience to those that tried to save "old" lenses the situation was a bit different in situations where neither autofocus nor auto-exposure based on full-aperture metering was a problem to begin with. This includes the use of EOS camera bodies on telescopes or microscopes or, in certain cases, on close-up devices such as bellows or extension tubes. In cases like this a simple camera lens flange mount conversion was quite appropriate and while Canon, as stated above, made such an adapter the fact it had the Canon name on it and was built to high standards of manufacturing and assembly the cost was commesurate. I decided to make my own converter "on a shoestring" so to speak. The process is relatively simple if one is willing to tolerate small amounts of imprecision often associated with improvisations. I generally find I can do this. Especially if it opens up avenues for creative experimentation in the process. To start with I took an EOS camera body cap. These are readily available and are quite inexpensive. I then removed a Canon FD body flange from an old extension tube I had lying around. It was held in place by three machine screws and removal of the flange was straightforward. In fact, such flanges are relatively easy to find these days as they are attached to many accesory devices made for the FD line of camera bodies. Even an old metal rear lens cap for an FD lens can probably serve although this might require some extra machining to remove excess metal. On the other hand, if you don't mind a bit of extra extension you may only need to knock out the back. I then proceeded to remove plastic from the center of the EOS body cap using a X-acto knife until the interior dimension of the hole cut into the plastic matched the interior diameter of the FD body flange. Fortuitously this dimension is pretty much the same as the interior dimension of the EOS body cap. In order to lock the EOS cap onto the camera's flange I placed the cap on the camera body and located the setting pin's position around the periphery of the plastic body cap's knurled outer surface. At this location I removed plastic so that a small threaded nut I had lying around that would just accept the camera's locking pin could be glued to the flange and when installed in this fashion it would provide a locking mechanism for the cap so accidental removal would not be possible. Placement of this small nut is a matter that demands some patience and precision in terms of placement but it is not extremely difficult to achieve. I used 2 part Epoxy resin to glue the nut in place after I had cut the plastic for a "pressure" fit into the depression I had cut in the plastic cap's edge. Once the locking pin receptor was in place I attached the plastic cap to the camera body and then placed the metal body flange on top of the plastic ring adjusting its position so that the locating notch in the metal FD flange was properly located (pointing straight up) so that when an FD lens or accessory would be attached to it the lens would be in the same position as it would be if attached to an FD camera body. I drilled small holes for the machine screws to initially attach the flange to the plastic body cap but for final installation I also securely epoxy glued the metal flange to the plastic mount and achieved a very solid connection between the two. Once I had made my adapter I started to think about what I could do with it. Not that I had not thought about this earlier but odd juxtapositions came to mind. Such as attaching an old short focus 135mm Leitz Elmar to my Digital Canon. I already had also made another adapter many years ago. This to adapt Leica screw mount lenses to FD bodies. (Canon used to make one of these also). It did not take too long to scrounge through boxes to find a set of FD extension tubes and select the right tube that when placed between the Elmar lens head (that is equipped with a focusing mount) and my new adapter so that infinity focus could still be achieved. Odd combination, no? A 135mm f/4 Leitz Elmar made in the 50's on a brand spanking new Canon Digital body! It works great! The camera is set to Program mode and it takes care of determinig the exposure time at whatever aperture the lens is set to. Essentially shooting in the "stopped down" mode.
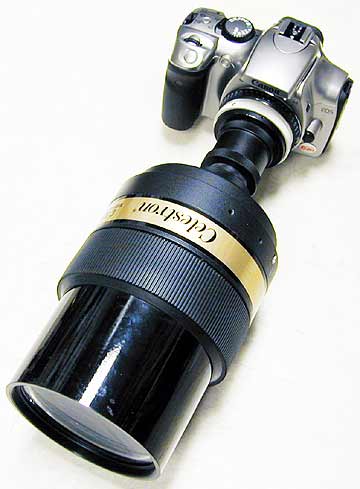
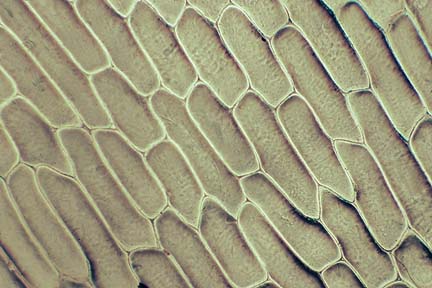
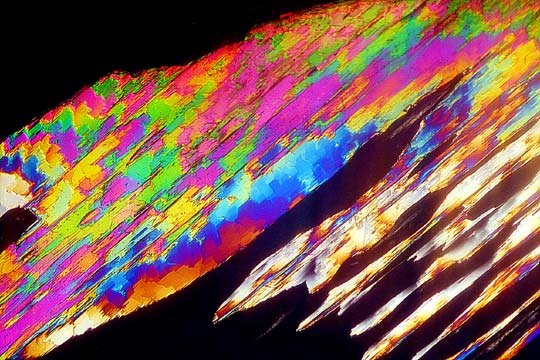
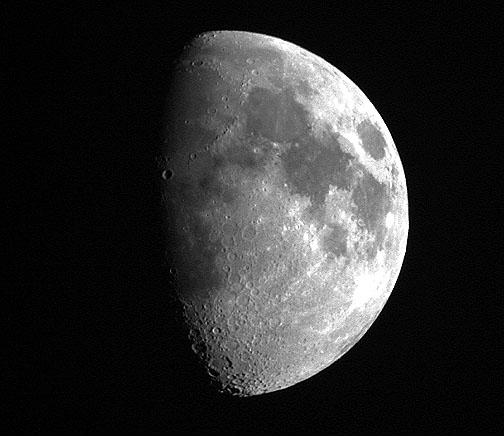
Note that students who borrowed the adapter I made noticeded that they could not "click" the adater in place onto the locking pin built into the EOS body flange using the metal nut I installed in the plastic EOS body cap. The reason for this is that unlike a complete lens, the cap does not provide an extended flat surface that pushes the locking pin in at the time the lens is attached and then finally allows the pin to drop into a registration and locking hole. For this reason, when using "my" adapter the camera's locking button must be depressed when the adapter is placed on the camera. This retracts the locking pin and allows the nut to come to rest just above the pin so that when it is released the locking pin engages in the hole in the metal nut. Further, I have been asked if it possible to use FD lenses and focus at infinity with them. Sadly this is not possible because the FD flange to film distance is shorter than the EF to film distance. Theoretically it might be possible to modify a Rebel Digital so it might accept both kinds of lenses but this would require major "surgery" and an adventuresome spirit! I am readily available to give Canon some advice! You might be interested in knowing that there _is_ an optical adapter that was made by Canon, and also available currently from HAMA (part 30845), which is essentially a short "telextender" that attaches to the EOS EF body mount and which has an FD lens mount at the front end. This does allow infinity focusing of FD lenses. However, there are penalties for its use: 1. All lens focal lengths are increased by a factor of 1.25x (a 100mm becomes a 125mm), 2. All lenses lose about 1 stop worth of aperture (an f/4 lens operates when set to f/4 as a f/5.6 lens) and 3. the "extender" adds some significant aberrations especially when short focal, large aperture, lenses are used. In fact, the mechanical aperture of the extender limits the effective maximum aperture of lenes attached to it. In my opinion it can be used effectively with lenses of maximum aperture of up to about f/4. Important notice: a word of caution regarding the possibility afforded by ready adaptation of a variety of lenses and other imaging devices to the camera body is that there is a greater likelihood of dust settling on the camera's sensor. This can, of course, be removed and in most cases is not a problem as the digital files can easily be retouched and spotted to overcome the stray dust speck. Nevertheless it pays to be observant about the level of dust in the environment especially when you interchange optics frequently. I should also mention that you undertake any project like this at your own risk when it comes to building and then attaching expensive cameras, lenses, etc. on each other. Remember that this article does not imply that whatever device you make will work as it did for me or that it is a safe device to attach and entrust your equipment to. Finally, I was also able to attach the Canon Rebel Digital to a 1000mm f/11 Celestron C90 telesope, a Canon FD bellows unit and an American Optical (transmission) as well as a Reichert (w/ transmission as well as epi-illumination capability) microscope. As you can hopefully see by the illustrations attached to this article the opportunity to experiment with astrophotography, photomicrography as well as plain pictorial photography with a digital capture camera has been a fun experience. It continues to be so!
If you would like to discuss this project with me I would be happy to provide whatever assistance is needed. Contact me at RIT, PO box 9887, Rochester, NY 14623. Phone 585-475-2592, fax 585-475-5804 ... but the fastest way is to just send me e-mail at andpph@rit.edu
|