         |
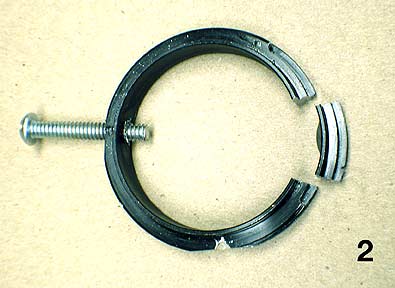
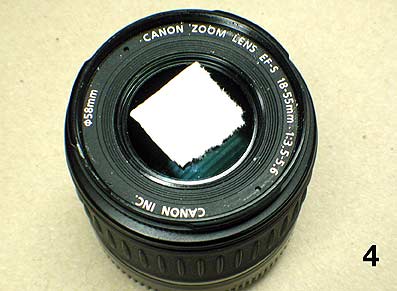
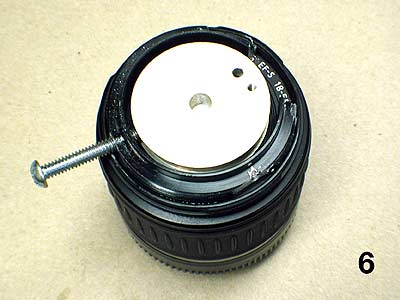
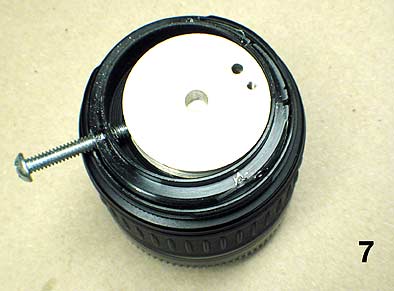
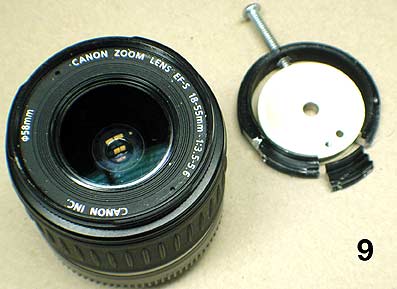
Improvised lens filter thread ding repair tool and procedure Andrew Davidhazy Imaging and Photographic Technology School of Photo Arts and Sciences Rochestter Institute of Technology Most photographers have at one time of another run into a situation where the filter thread ring on the front of the lens has been bent in some accident and now there is a need to attach a certain filter or accessory to the len's filter threads. Generally any small ding on the threads that causes a non-circular shape will impede the attachment of any item to the camera's lens. This happened to me the other day. Don't ask HOW the filter threads got damaged but luckily the rest of the lens, including its autofocus motor and mechanism, were intact. This was proven by tests I performed on the lens. But then I wanted to attach some filters to the lens. Nothing doing! So then I did a rudimentary search for repair tools that would "straighten" out the threads. Either there are none around these days or I just could not find one. I did run across instructions of various kinds for dealing with the problem but I decided none was satisfactory for my purposes. I happened to remember that Edmund Scientific at one time did sell just such a tool But, alas, no longer. So I decided to try making my own. First I located a metal ring salvaged from some lens adapter that was roughly the same diameter as that of my filter threads. These were 58 mm and the metal ring was about 54 mm. You can see it in figure 2 although it has already been cut as shown as described in the following paragraph. I cut a segment out of the ring maybe about 10 degrees in size. On the opposite side I drilled a hole, leaving a small ridge below its lower edge (the edge that would be nearest the lens threads) and tapped it with a 3/8x24 tap. Into the tapped hole I screwed a bolt. Then I found a metal disc that was somewhat smaller than the diameter of the inside of the metal ring out of which I had cut a section. See figure 3. For the "repair" the procedure went as follows: First, at figure 4, I placed a protective covering on the front of the lens surface. Then, at 5, I placed the "split ring" into the well of the camera lens where the threads are located. I pressed the edge where the bolt was located at a spot opposite the offending ding. Shown in 5. At figure 6 I placed the metal disc into the depression of the split-ring and onto the covering protecting the lens surface. Finally, as shown in 7, I dropped the piece of the split-ring that I had cut out of the larger ring into the open space opposite the threaded bolt. Now, as shown in figure 7 to the left, by turning the bolt it would push onto the metal disc and this in turn would push on the loose piece of the split-ring and it, in turn, pushed on the ding. I took advantage of the "lever" effect of the screw to increase the localized and directional force that was applied to the ding. This can be seen happening in figure 8 to the left. The distorted filter ring slowly lost the ding as it's diameter crept out and into a round shape. Once this was done pressure was relieved on the threads and Voila! I can now fit my plethora of 55 mm filters and accessories with 55 mm threads onto my lens ... again! I am happy. A few words of caution: This has been my experience. If you attempt something like this I can not be responsible for any damage you cause to your lens or that of others. In particular I would be very careful when trying to readjust the shape of plastic filter rings as these tend to keep their bent shape and if overpressured may simply open up with a snap! |